
Property Renovation Case Studies in Brighton & Hove
A practical look at renovation, refurbishment, flooring, bathroom, kitchen and staircase work carried out in real homes across Brighton and Hove.
A good case study should show more than a finished photograph. What was the property like before the work started? What failed? What needed preparing? What was hidden under the old flooring, behind the tiles, or inside the previous repair? That is what this page documents.
What should a renovation case study show?
A proper renovation case study should show the condition of the property before work started, the problems found during inspection, the preparation carried out, the materials and methods used, and the finished result. For Brighton and Hove homes, useful case studies should also explain local issues such as damp, coastal exposure, older plaster, converted flats, leasehold restrictions, acoustic flooring and ventilation.
Why case studies matter
Many renovation websites show polished final photos. That is fine, but it is not enough.
The final photo does not show whether the subfloor was checked before new flooring went down. It does not show whether damp was investigated before the wall was painted. It does not show whether the bathroom was waterproofed properly before tiling. It does not show whether the old plaster was sound, whether ventilation was improved, whether the floor was level, or whether the sequence of trades was planned properly.
A real case study should give the homeowner confidence that the work was not just made to look good for a photograph. It should show that the job was understood, prepared and finished in the right order. That is especially important in Brighton and Hove, where many properties are older, coastal, converted into flats or affected by damp, ventilation, access and leasehold issues.
How we write our case studies
Every case study on this website is based on real work. We do not use invented client stories, fake project descriptions or made-up before-and-after results. Where exact addresses or client names are private, we keep them private. A case study does not need to reveal personal details to be useful — it needs to explain the property type, the work carried out, the problems found and the practical decisions made.
Real property condition
The starting condition should be described honestly: worn flooring, blown plaster, damp staining, tired decoration, poor ventilation, dated kitchen, damaged bathroom or general wear.
Real site problems
Useful case studies explain what made the job straightforward or difficult: uneven floors, access, drying time, old repairs, hidden moisture, poor previous preparation or leasehold restrictions.
Real process
The page should explain the order of work. Renovation is sequencing: strip-out, repair, preparation, first fix, finishing and snagging.
Real materials
Materials should be named in plain terms where possible: engineered flooring, LVT, acoustic underlay, durable matt paint, bathroom tanking, plaster repair, moisture-resistant boards.
Real outcome
The finished result should describe what improved: durability, appearance, ventilation, sound control, layout, maintenance, rental readiness or comfort.
No invented detail
We do not invent client names, exact prices, project dates, testimonials or fake addresses. If a detail is private, we keep it private. The work itself provides the evidence.
Flooring installation where preparation mattered
Brighton · Period house · Engineered oak hardwood · Full-property replacement
 Before
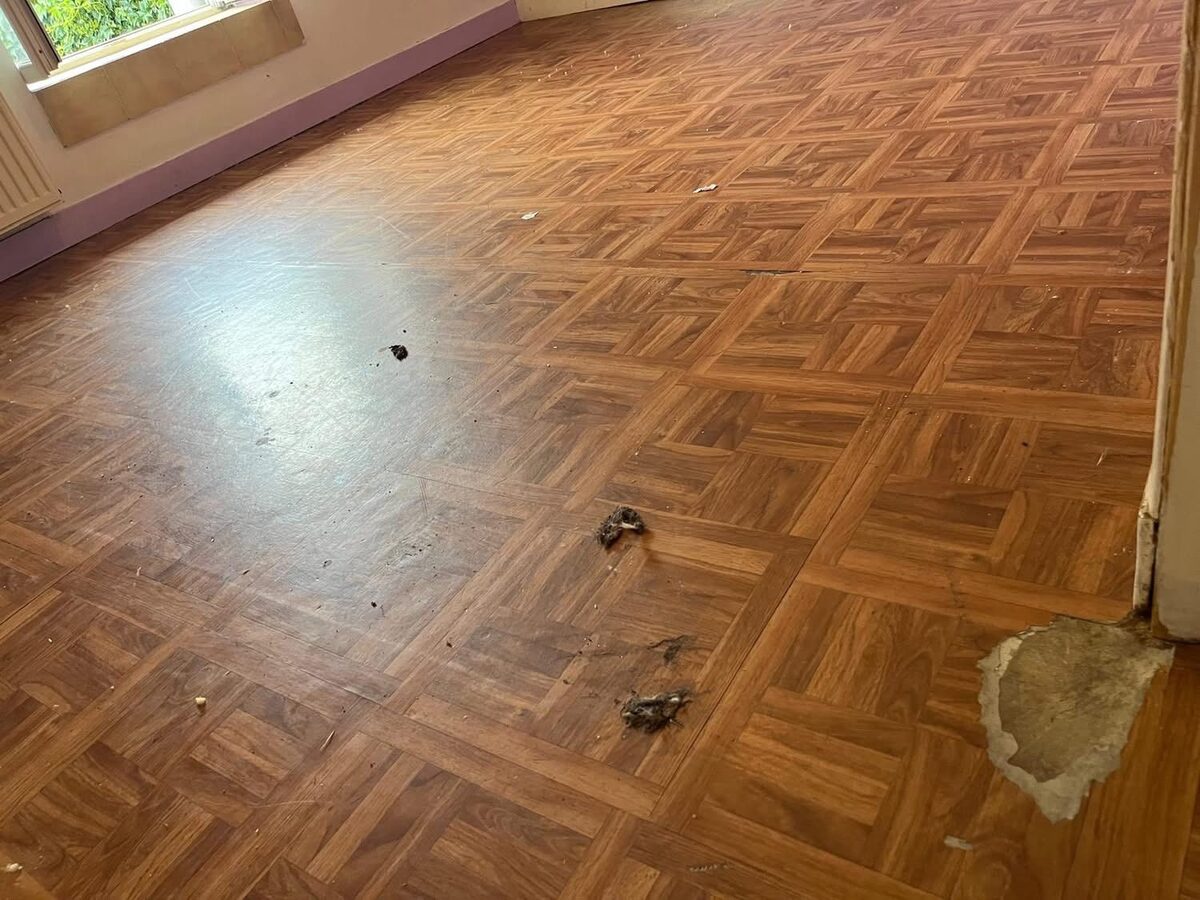
The starting condition: worn mosaic parquet with lifting vinyl tiles and a section of subfloor exposed at the skirting board. This is the base that had to be properly prepared before any new flooring was installed.
Site note
With flooring, the finish is only as reliable as the base. A good installation starts with moisture, levels, movement and acoustic checks. If those are ignored, the floor can fail even when the material itself is perfectly good.
Flooring is a good example of why case studies need more than finished photos.
From the top, a new floor may look simple: choose the colour, order the boards, fit them neatly and finish the edges. On site, the important work starts before the first plank is laid. The existing floor needs checking. Is the subfloor dry? Is it level? Does it move? Is the property a flat? Is there a neighbour below? Is the old floor hiding damaged boards, loose tiles, failed adhesive or moisture?
In this Brighton period property, the starting point was worn mosaic parquet with lifting vinyl tiles and a partially exposed subfloor near the skirting board. The concrete base had to be assessed, cleaned, levelled and prepared before any engineered boards could be laid. The room with south-facing French doors then needed expansion gap allowances calculated accurately — the boards needed room to move seasonally without the floor lifting or closing at the joints.
The attic bedroom in the same project required individual scribing for every board along the angled walls. Nothing here was a straight cut. The loft room next had the same challenge: sloped ceilings, a built-in wardrobe and natural light angles that would show any mistake in the finish immediately. Careful cutting and minimal wastage across all three rooms made the difference between a floor that looks right and one that just looks done.
Staircase renovation — new timber treads, Brighton
Brighton · Victorian terrace · Staircase renovation · Carpet removal, structural check, new treads and painting
Before
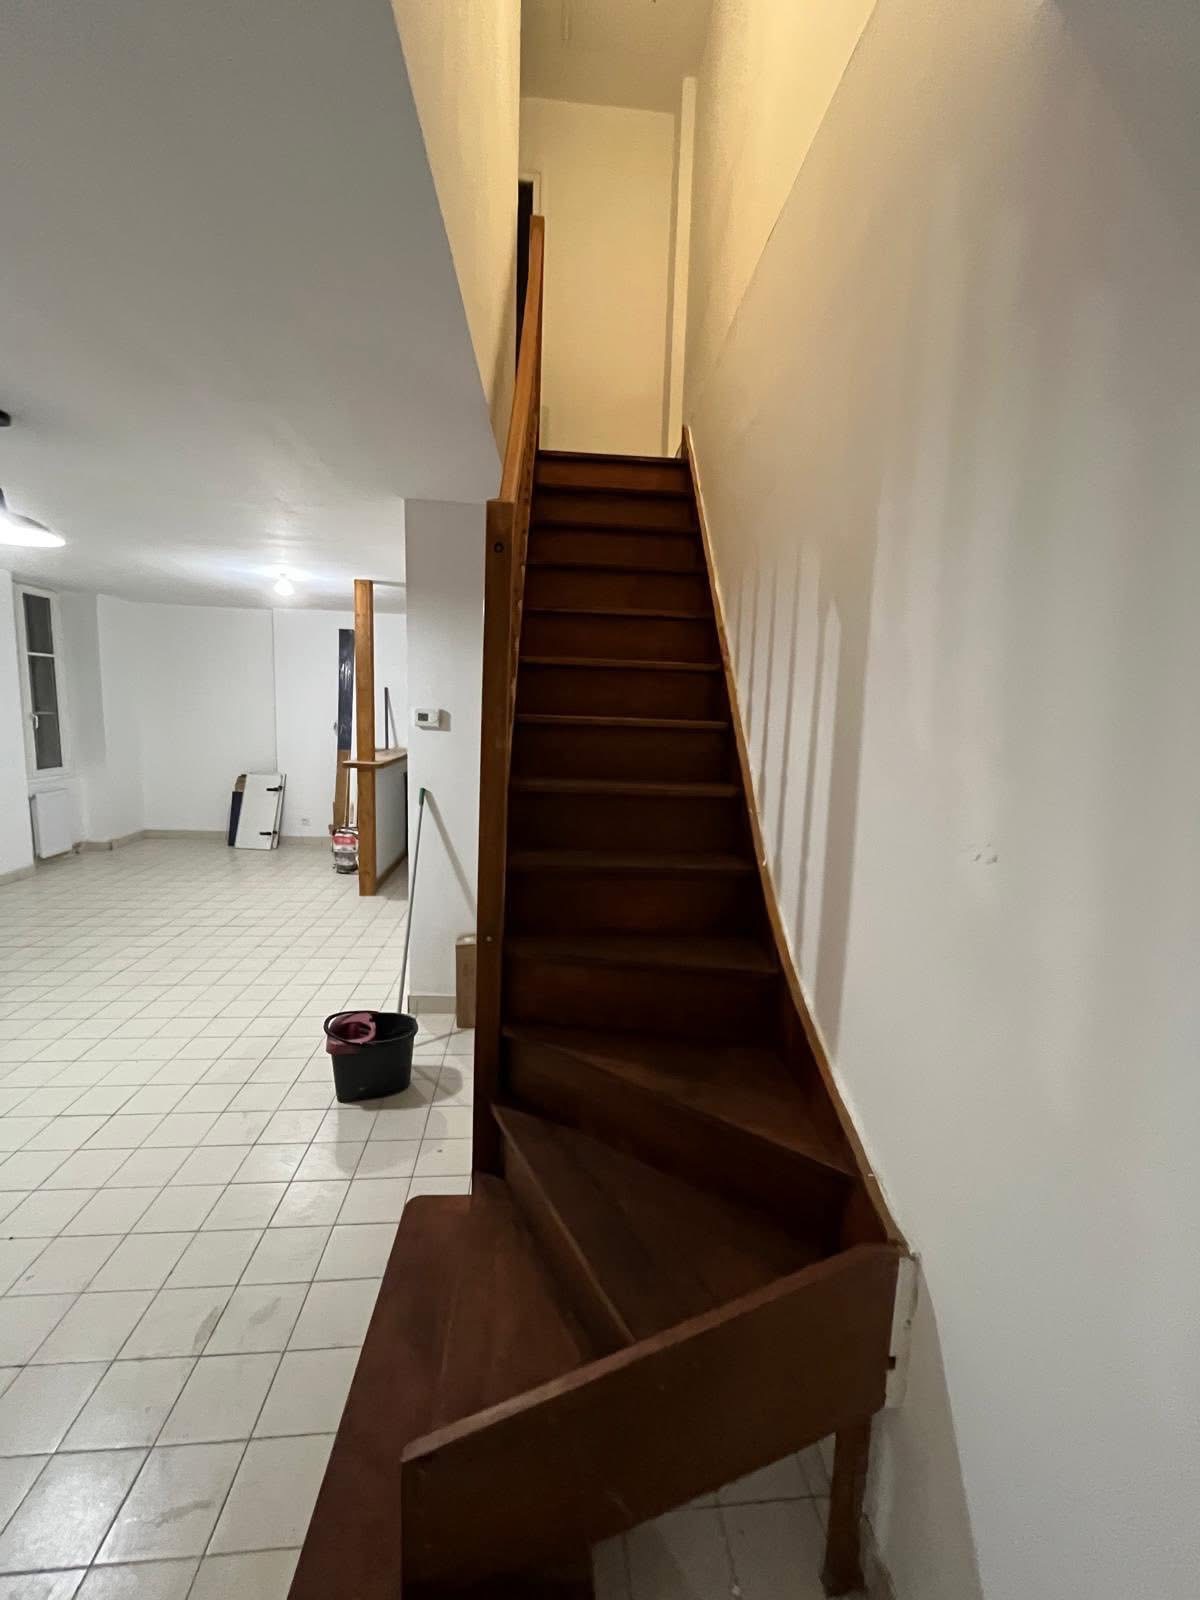
Before: the staircase in its original condition with dark worn timber treads and the ground floor cleared ready for works. This is the starting point before any renovation work began.
During
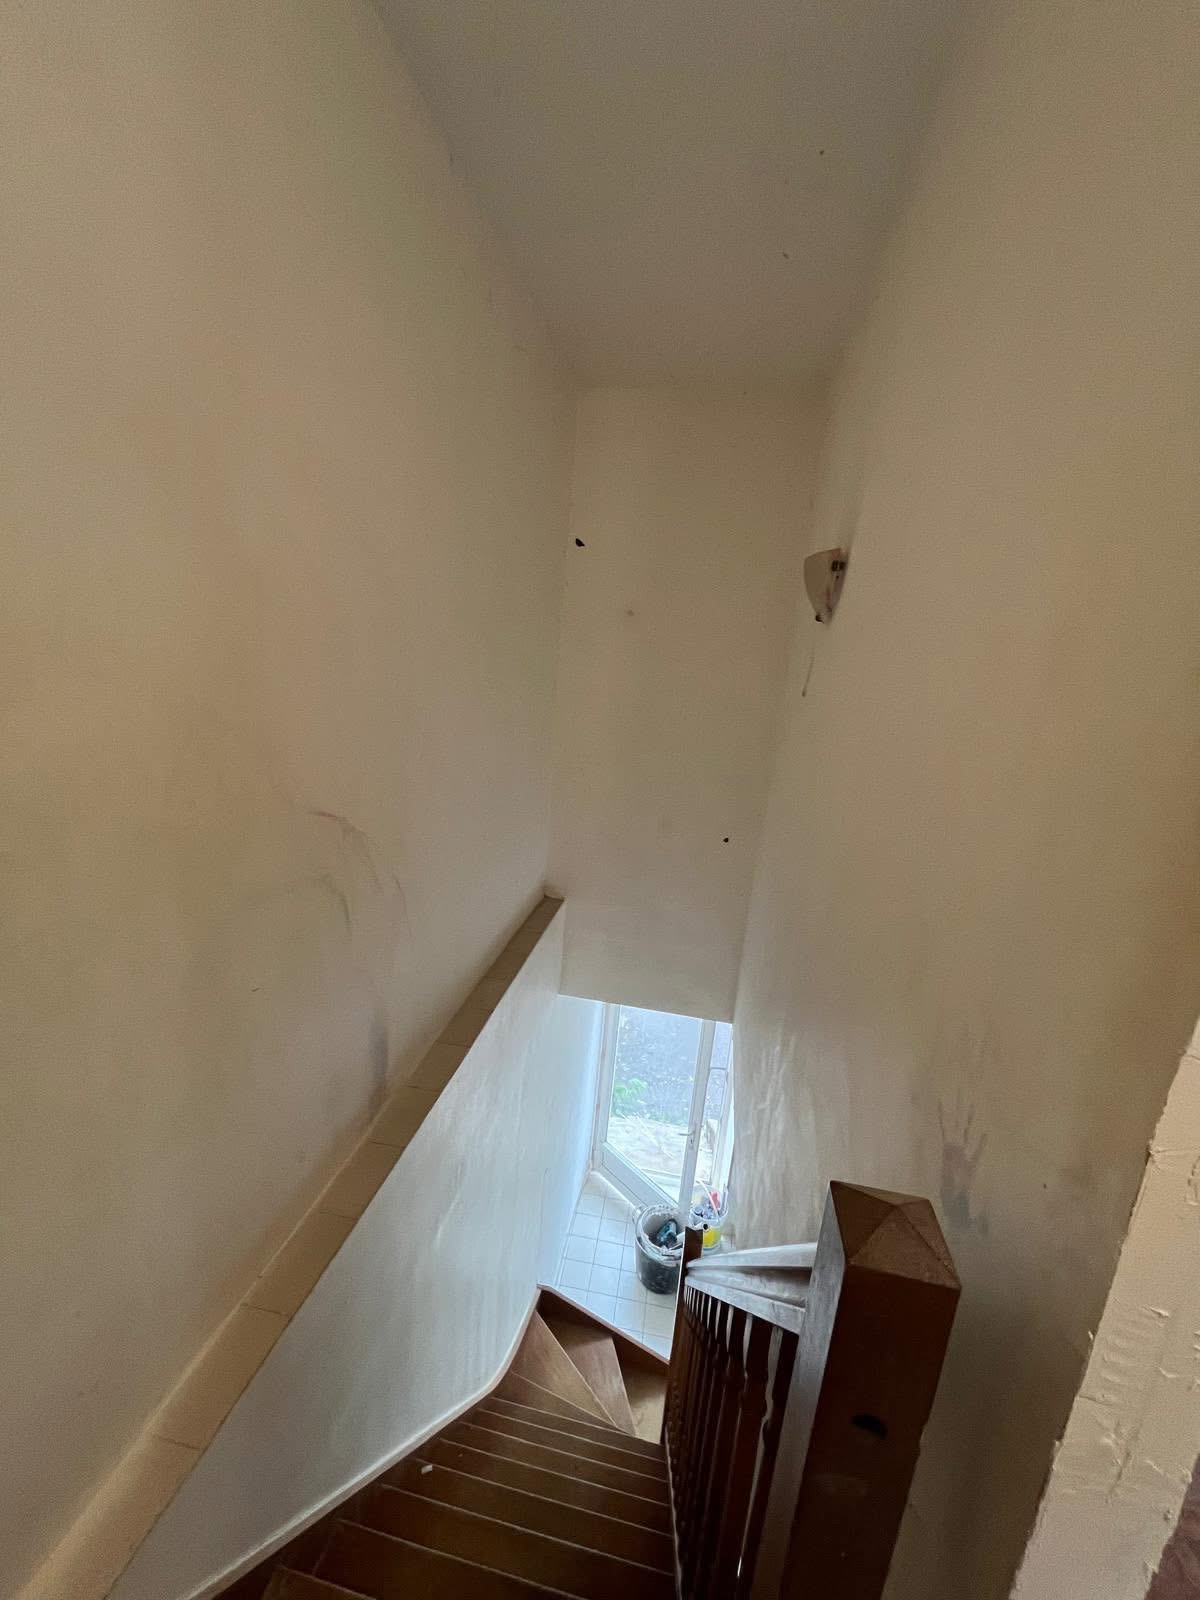
Works in progress: stairwell walls replastered and painted. The door at the bottom also needed repair and repainting — it was included in the scope so the whole stairwell finished consistently.
After
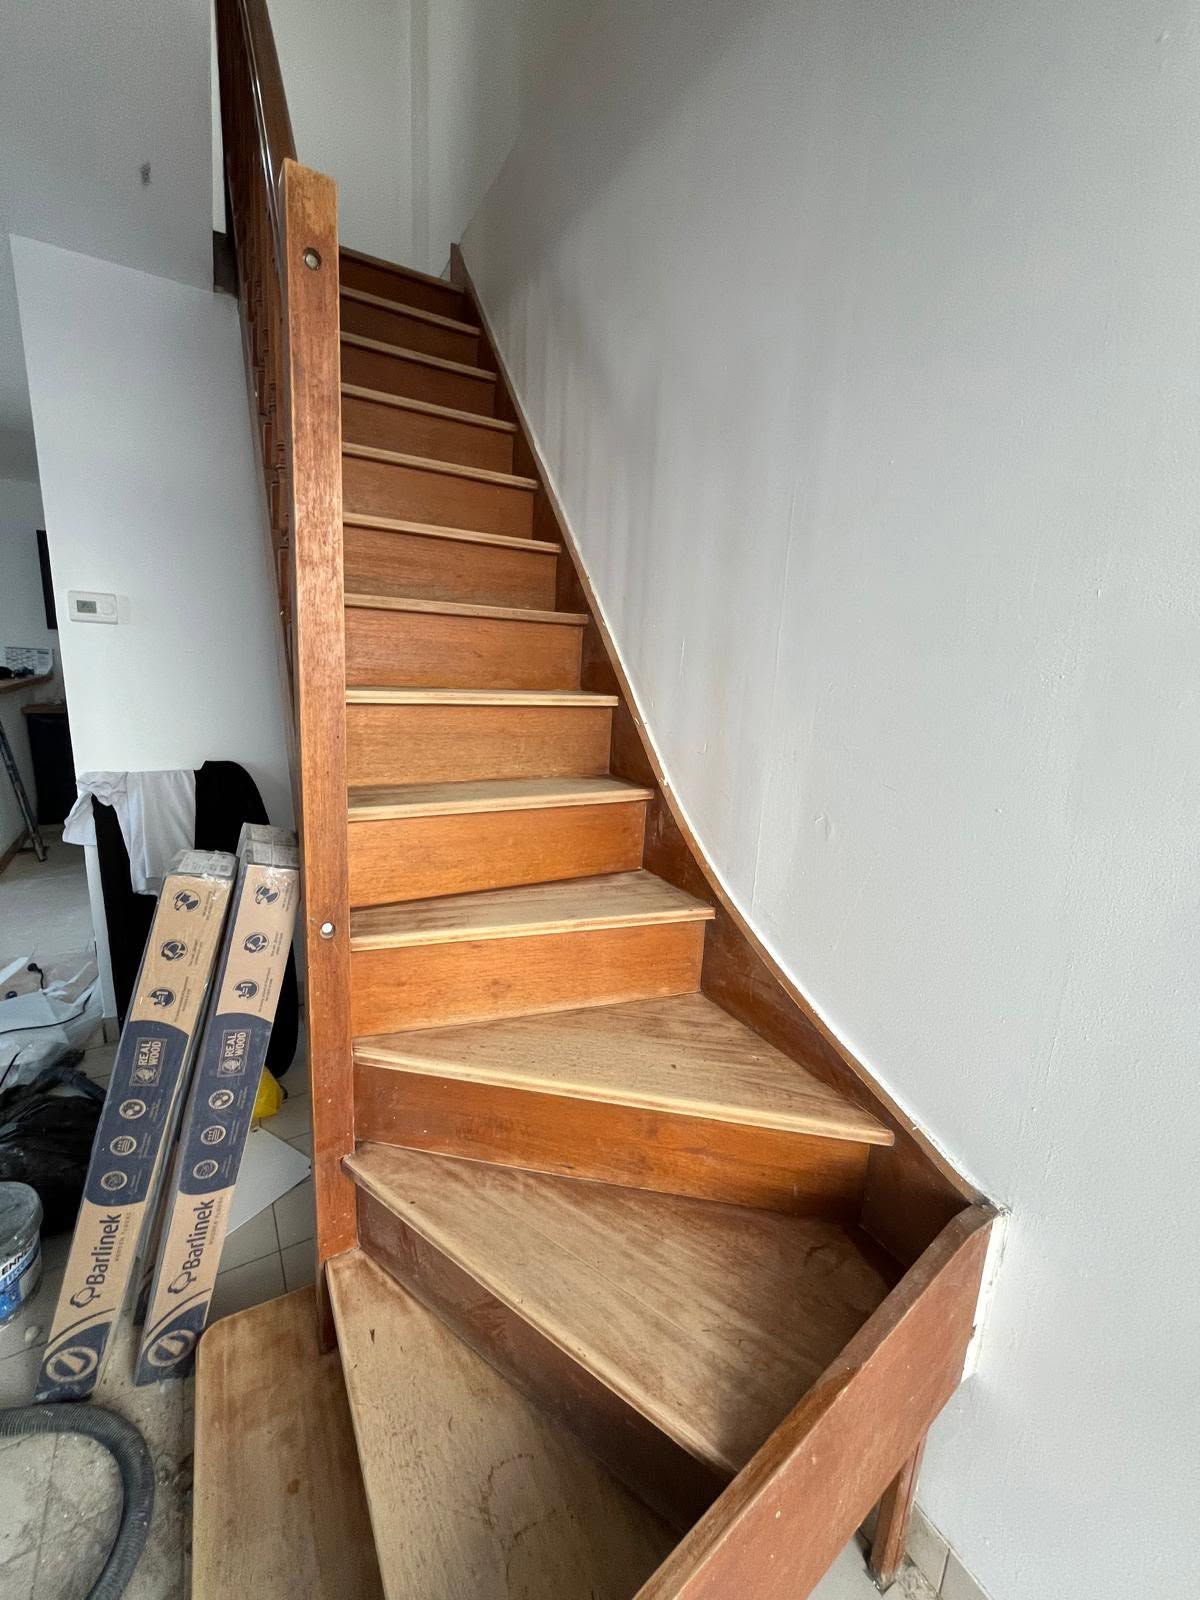
After: new timber treads fitted and the staircase ready for final finishing. The Barlinek boards on the left show the flooring material used throughout the property.
This Brighton Victorian terrace had a staircase that looked passable under the old carpet. Once the carpet came up, the actual tread condition became clear: worn surfaces, several cracked risers and a balustrade that had accumulated layers of paint over decades.
The staircase was stripped to its structural frame. Each component was checked at that stage — any that needed replacing went before the new treads were fitted, not after. The balustrade was sanded and refinished. New timber treads were fitted over sound risers. Risers were painted white. The result is a staircase that feels solid underfoot and holds up to daily use properly, not just for the photograph.
Project examples
Browse real project examples by type. Each entry uses real photographs taken on site.
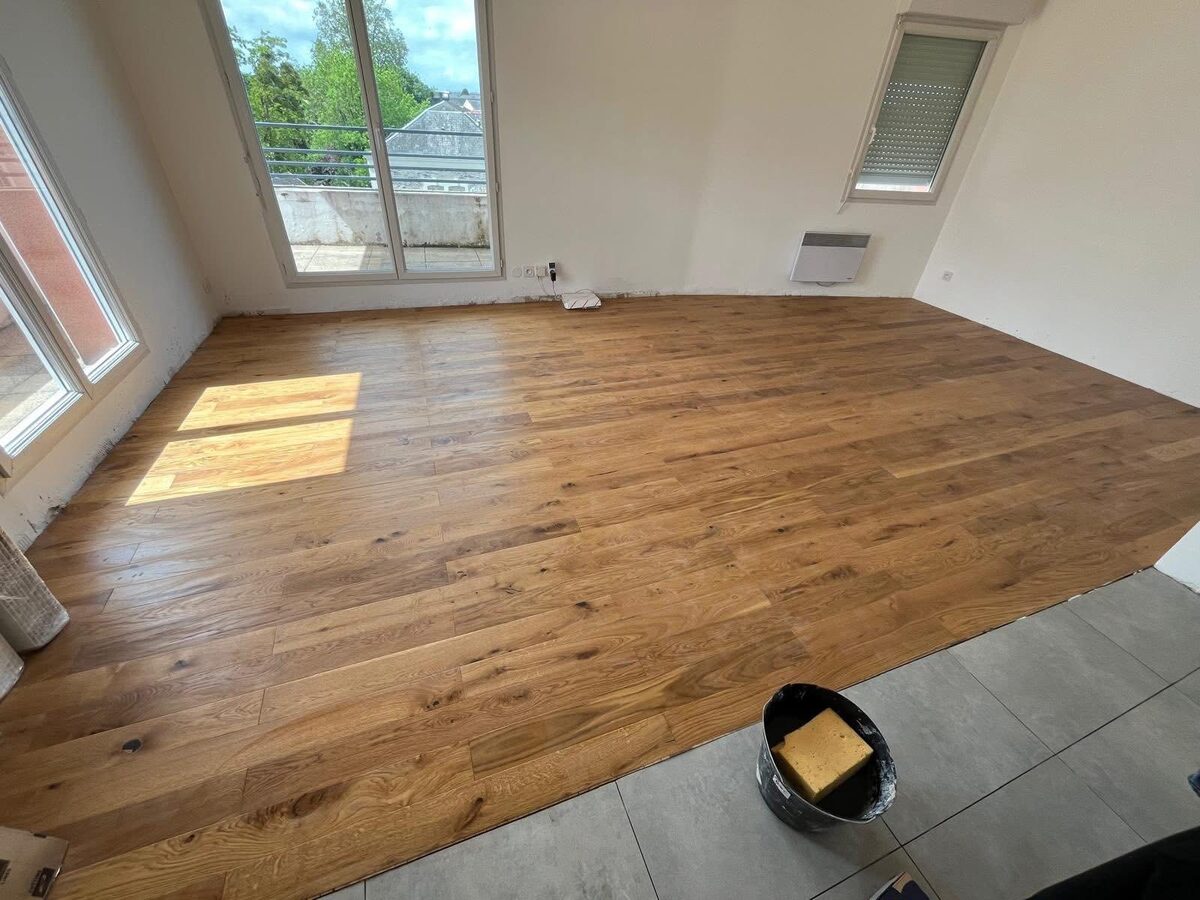
Engineered oak flooring — full-property replacement, Brighton
Old mosaic parquet removed, concrete subfloor prepared, and engineered oak hardwood fitted throughout the living room, bedrooms and attic. Three-stage project photographed from starting condition to completion.
Main challenge
Worn parquet with lifting vinyl tiles, uneven concrete subfloor and an attic bedroom with angled walls requiring precise scribing.
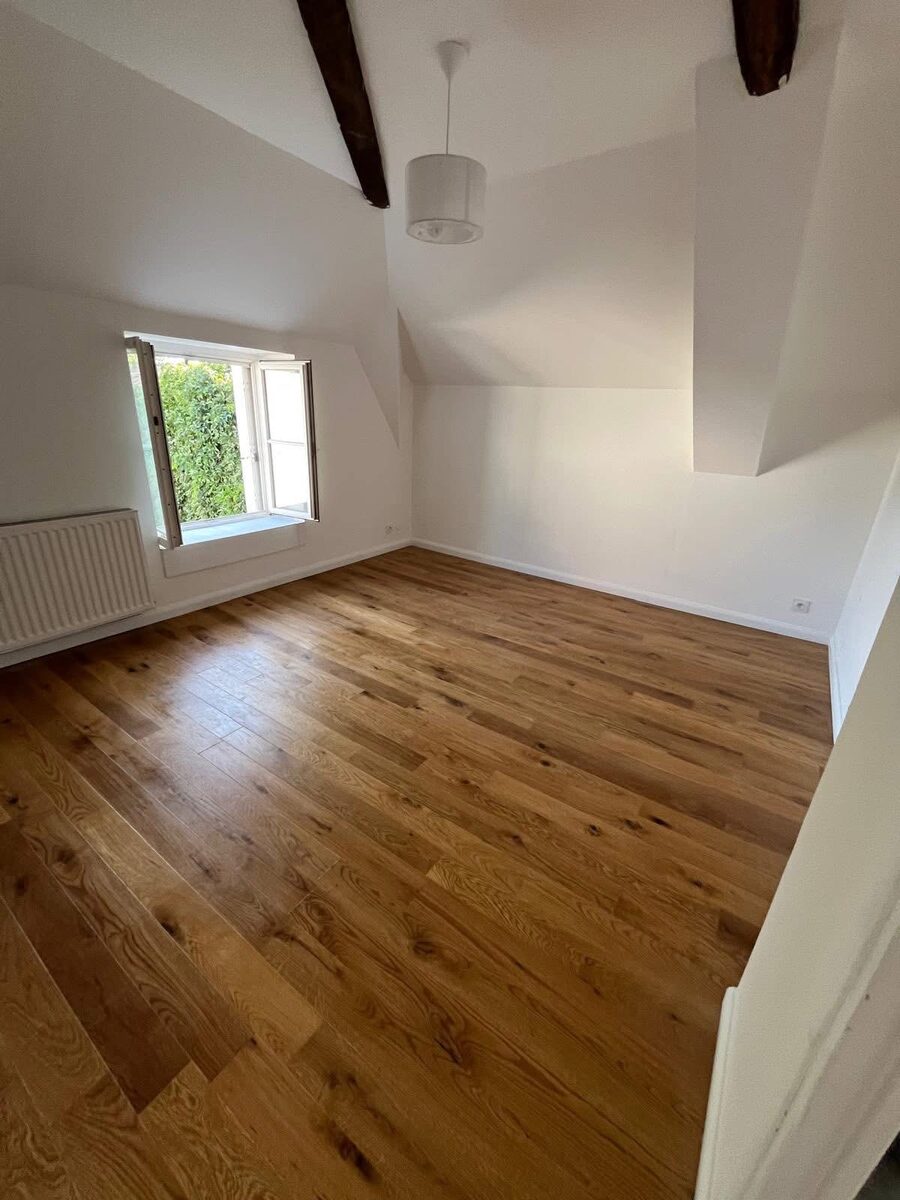
Oak hardwood floor — bedroom renovation, Hove
Wide-plank oak hardwood floor fitted in a bedroom as the final room in a whole-property flooring project. All rooms specified from the same batch for colour consistency. Underfloor heating compatible specification used.
Main challenge
Matching the new installation to the rest of the property while working around a radiator under the window and ensuring the spec was compatible with the existing heating system.
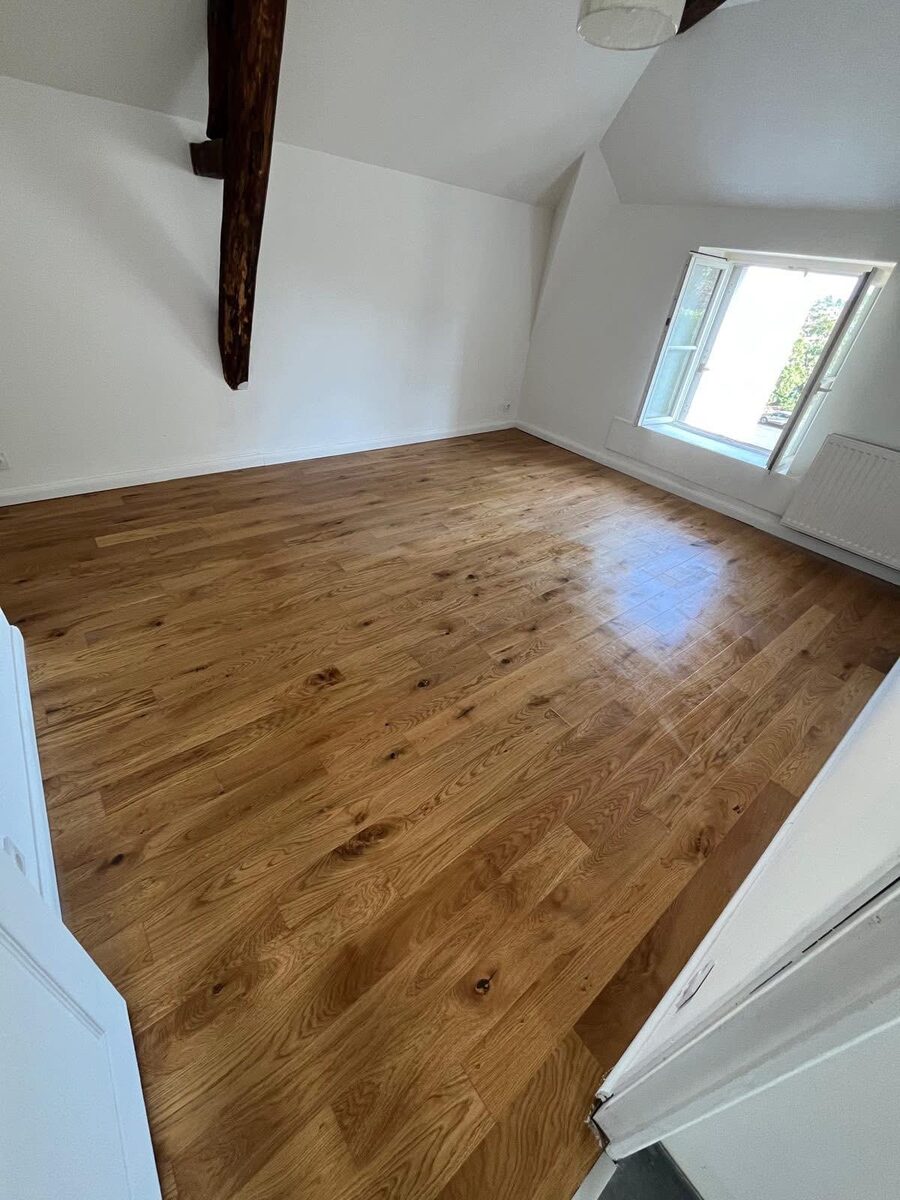
Oak floor — loft room with angled walls, Hove
Solid oak boards laid diagonally in a compact loft room with sloped ceilings and a built-in wardrobe. Three-coat UV oil finish. Precise scribing at the angles kept wastage minimal.
Main challenge
Angled walls, sloped ceilings and a built-in wardrobe meant every board at the perimeter needed individual scribing. No margin for error.
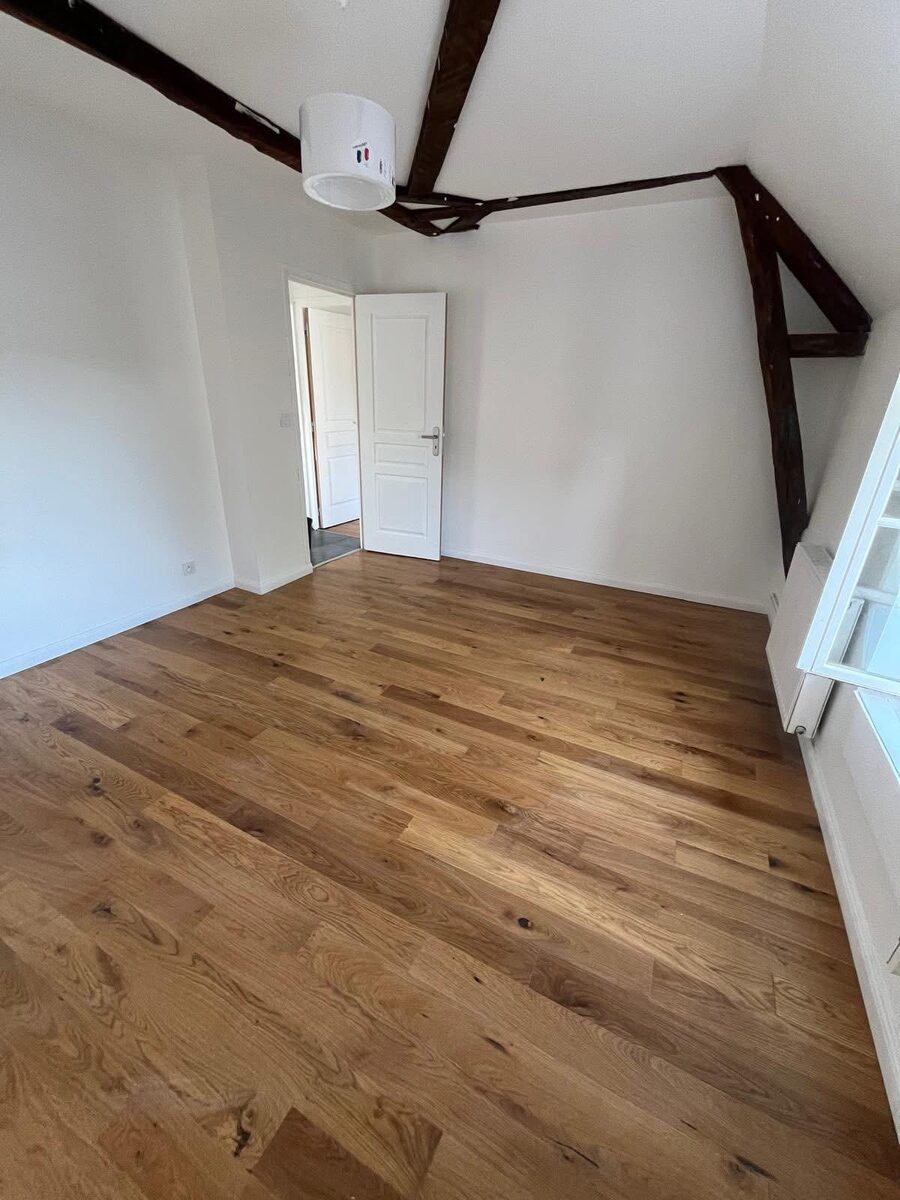
Solid oak attic bedroom — exposed beams, Brighton
Solid oak hardwood fitted in an attic bedroom conversion. Character boards complement the original exposed roof beams. Part of a three-room flooring sequence across the same BN1 property.
Main challenge
Working in an attic space with restricted access, limited headroom during installation, and matching the floor spec to character beams already in place.
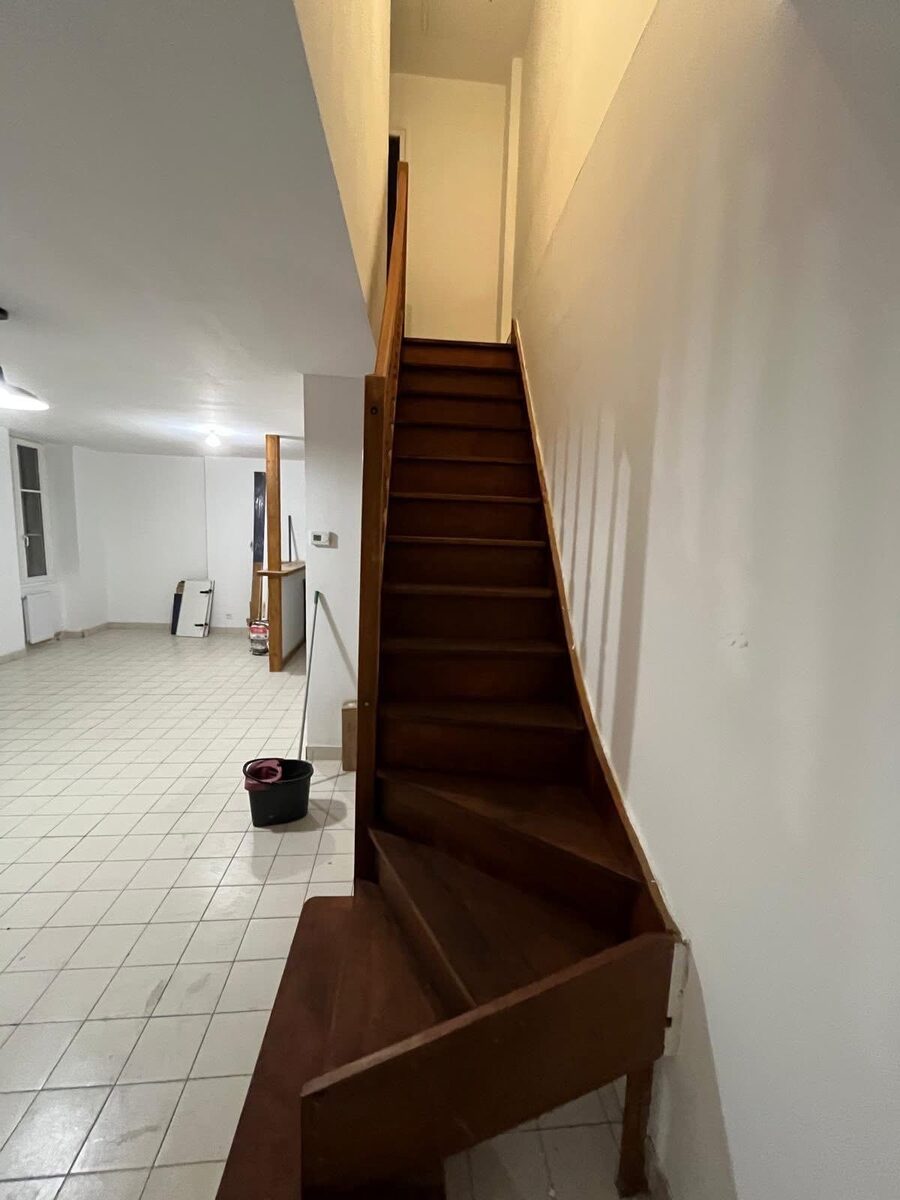
Staircase renovation — new timber treads, Brighton Victorian terrace
Carpet-covered Victorian staircase stripped to the structural frame, each component checked, damaged risers replaced, new timber treads fitted, and risers and balustrade freshly painted. Full before/during/after series.
Main challenge
Old carpet was concealing the true tread condition. Several risers needed replacing before new treads could be fitted on top — work only visible once stripped back.
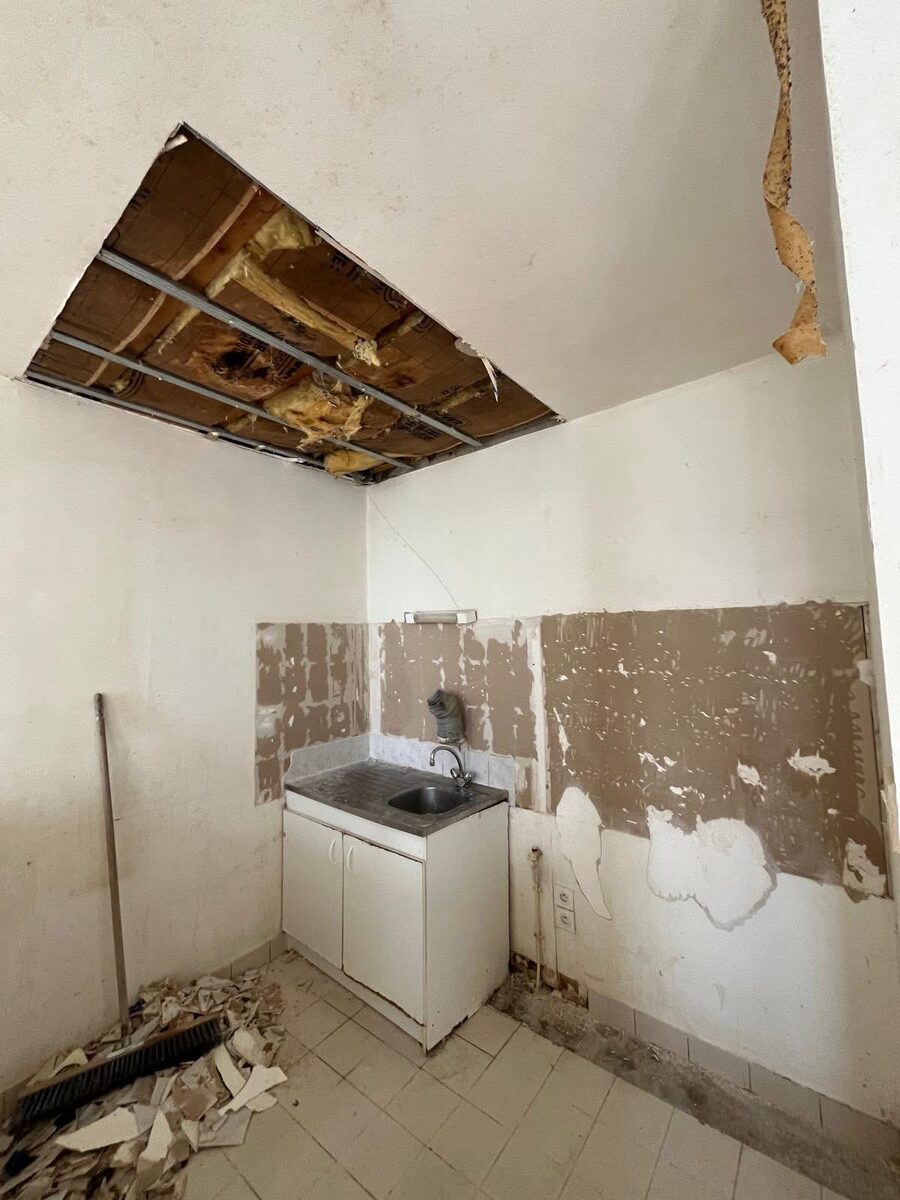
Kitchen strip-out — damp investigation and tile removal, Brighton
Full kitchen strip-out following visible damp at the base of the under-sink unit and failing old tiles. Ceiling section opened to investigate a suspected leak. All tiles removed to expose the substrate condition before the next stage of work.
Main challenge
Damp at the base of the unit and a ceiling void that needed opening before any new fittings could be planned. The cause had to be found before the next stage was specified.
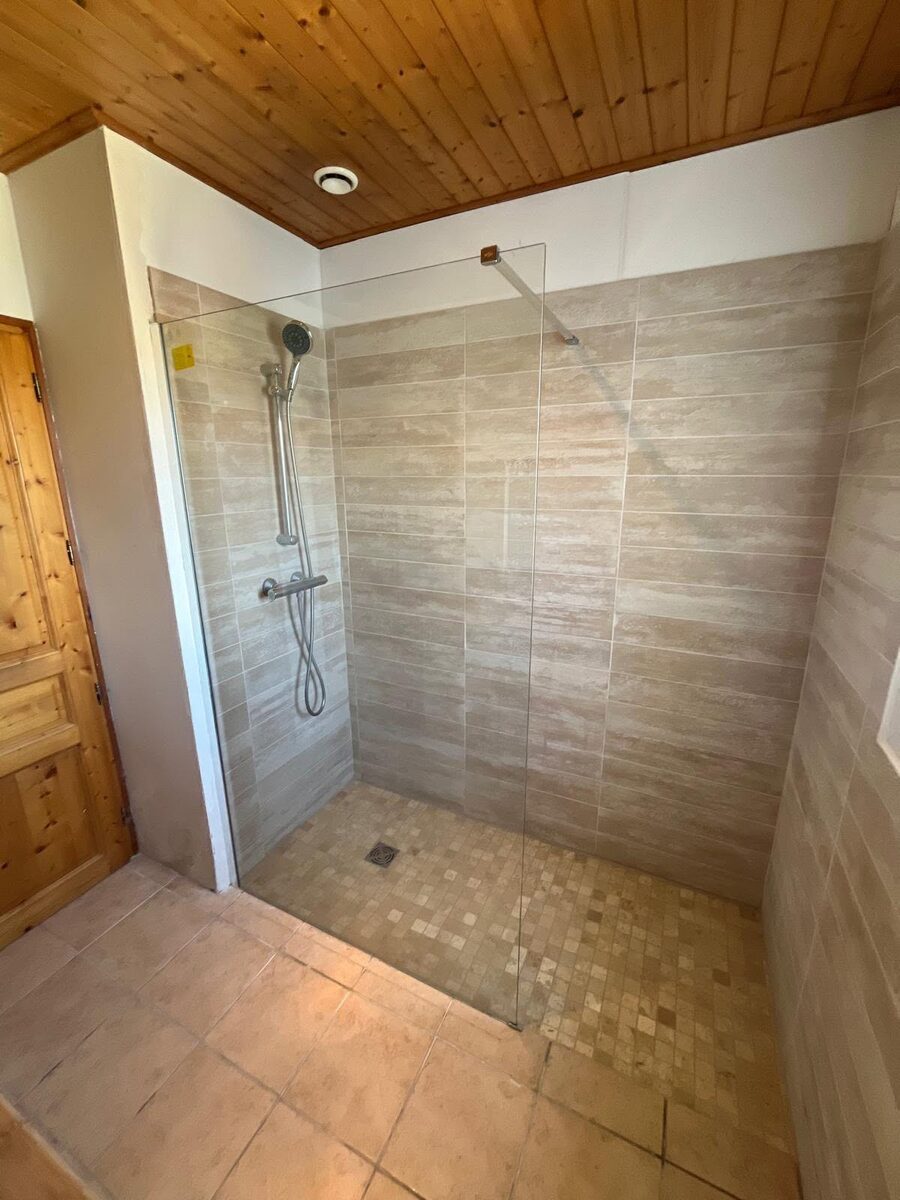
Walk-in shower — stone-effect tiles and frameless glass panel, Brighton
Walk-in shower installation with full-height stone-effect horizontal wall tiles, linear mosaic floor with central drain, and a frameless glass panel. Rainfall and handheld shower. Natural pine ceiling above.
Main challenge
Ensuring a watertight wet-room finish across the full floor area and maintaining a contemporary look within the available space, including the angled ceiling from above.
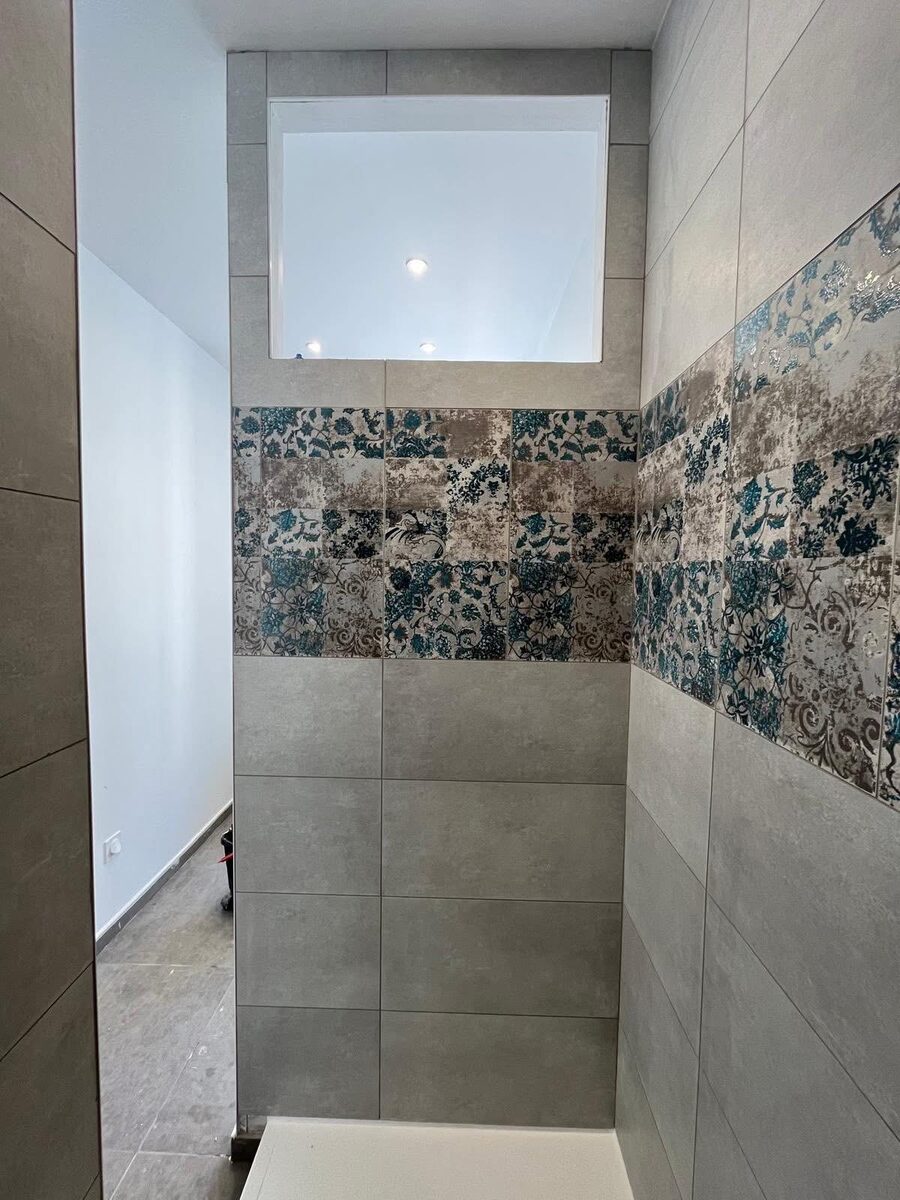
Bathroom tiling — large-format grey porcelain with decorative band, Brighton
Large-format grey porcelain tiles from floor to ceiling with a floral decorative band running across all three walls at mid-height. Square rooflight above for natural light. Minimal grout lines throughout.
Main challenge
Achieving continuous grout alignment across three walls while cutting and setting the decorative band at the correct height on each wall.
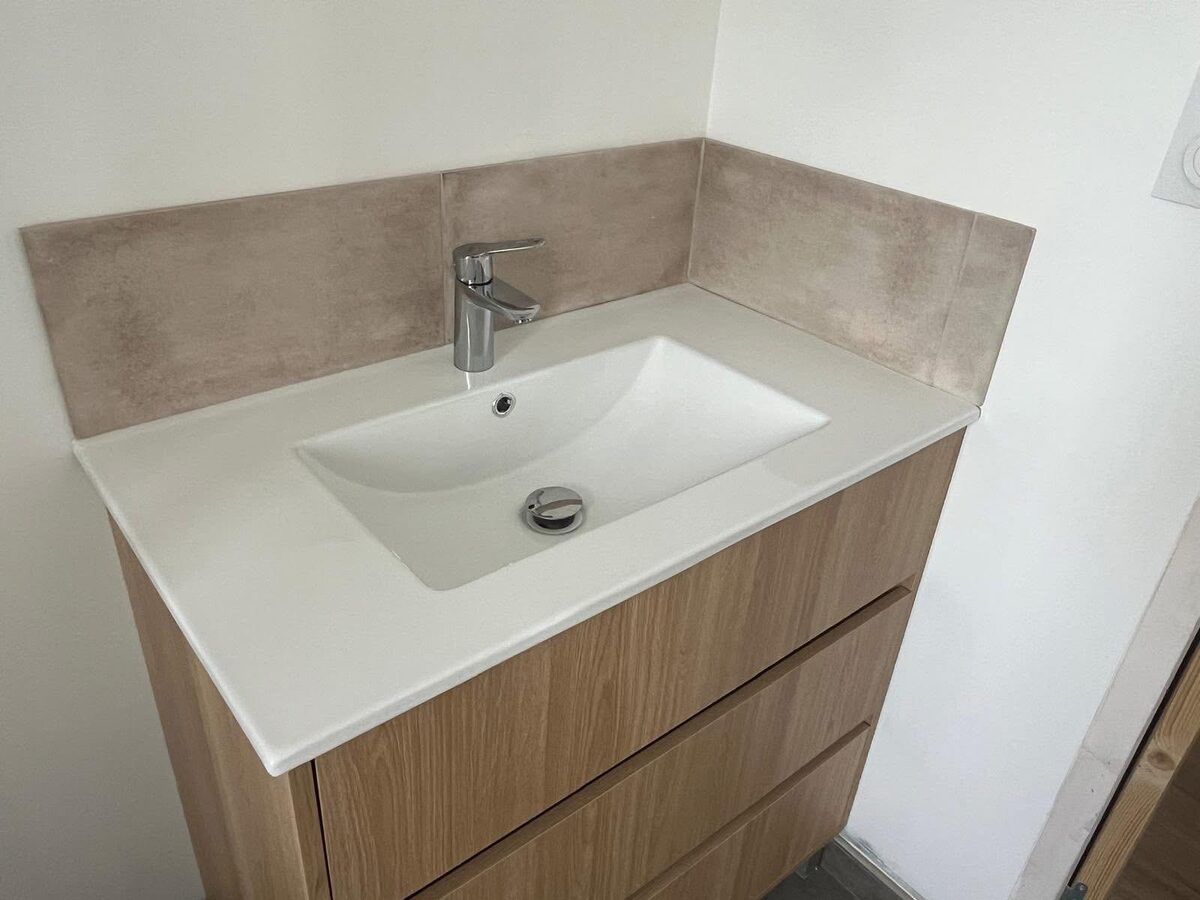
Bathroom vanity — oak drawer unit and beige tile splashback, Brighton
White ceramic inset basin set into an oak-effect drawer unit with brushed chrome mixer tap and beige linen-finish tile splashback. Part of a wider bathroom renovation that also included the shower tiling.
Main challenge
Working within the available wall space in a period conversion where the existing pipework positions constrained the vanity unit placement.
What a useful renovation case study should include
A renovation case study should help a homeowner understand how the work was approached, not just what the final room looked like. The most useful project examples explain the property type, the original condition, the client's aim, the issues found during inspection, the preparation carried out, the trades involved, the materials used and the finished result.
In older Brighton and Hove properties, this detail matters. A finished wall may look clean, but was the damp source fixed? A bathroom may look new, but was the ventilation improved? A floor may look sharp, but was the subfloor level and suitable? A kitchen may look modern, but were the services and walls prepared properly first? The case study should answer those questions.
Each case study should show:
- —The property type: flat, house, terrace, converted building, rental or family home.
- —The general location: Brighton, Hove or nearby Sussex area.
- —The reason the work was needed.
- —The condition before work started.
- —The main problems found on site.
- —The preparation carried out before finishing.
- —The trades or work stages involved.
- —The materials or systems used where useful.
- —The practical decisions made during the job.
- —The finished result.
- —Before, progress and after images where available.
What Brighton and Hove projects often have in common
Brighton and Hove renovation projects often share the same hidden themes, even when the finished work looks different. Flats can be affected by neighbours, leasehold permissions, acoustic flooring and access through communal spaces. Older houses can contain mixed repairs from different decades. Coastal-facing walls and exterior finishes can wear faster than expected. Bathrooms and kitchens often show the results of weak ventilation. Floors in period properties are rarely perfectly level.
Converted flats
Often need attention to noise, access, leasehold rules, shared services and careful protection of communal areas.
Coastal exposure
External walls, windows, timber, render and paint may need stronger preparation because of wind-driven rain and salt air.
Older plaster
Blown plaster, powdery surfaces and poor previous repairs should be corrected before decorating or tiling.
Damp and ventilation
Many visible defects are symptoms of moisture. Case studies should explain whether the issue came from condensation, leaks, external failure or trapped moisture.
Uneven floors
Flooring projects should document subfloor condition, levelling and acoustic decisions, especially in flats.
Trade sequencing
The order of work matters. The best case studies show why preparation, services, plastering, flooring and decorating were done in a particular order.
How project photos should be used
Photos should support the explanation, not replace it. A before photo shows the starting point. A progress photo shows the preparation and hidden work. An after photo shows the finished result. All three are useful for different reasons.
Show original condition, damage, wear, dated layout or failed finishes.
Show preparation, repairs, subfloor checks, waterproofing, plastering, levelling or trade sequencing.
Show the finished result once the work is complete and cleaned.
Project types we document
Over time, this case study library will cover the most common types of renovation and refurbishment work carried out in Brighton, Hove and nearby Sussex properties.
Case studies should explain access, leasehold issues, neighbours, acoustic flooring, ventilation, kitchen and bathroom upgrades, and how the work was sequenced inside a shared building.
Refurbishment examples should show how tired or damaged properties were improved without pretending every job needed a full rebuild. Useful for landlords, buyers and homeowners preparing for sale or long-term use.
Flooring case studies should show subfloor preparation, moisture checks, acoustic underlay, levelling, thresholds and the reason the chosen floor was suitable for the property.
Decorating examples should show preparation, plaster repairs, stain treatment, breathable paint decisions, exterior exposure and the difference between quick repainting and proper surface preparation.
Bathroom case studies should explain waterproofing, ventilation, plumbing changes, tiling preparation, hidden damage, leak prevention and final finishing.
Kitchen examples should show layout constraints, services, wall preparation, flooring, worktops, lighting, appliance positions and finishing details.
Damp repair case studies should be especially careful. They should explain the investigation, likely cause, repair method and why simply painting over the stain was not enough.
Maintenance examples should show how small defects were handled before becoming larger problems — gutters, exterior seals, cracked finishes, moisture marks and landlord repair lists.
Frequently Asked Questions
Planning a similar renovation?
If you have seen a project that looks similar to your own property, send a few photos and explain what you want to change. The useful part is not copying the finish exactly. It is understanding whether your property has the same conditions underneath. A good renovation starts with inspection, preparation and sequencing. The finished result comes after that.